


 One summer, my college roommate’s friend, Jae Duc, came to stay with us for a few weeks prior to a piano competition. Jae Duc was one of the sweetest but most accident prone people one could ever hope to meet.
In large part this was due to the fact that she had never had to do much for herself, other than play piano. While this got her to America, it didn’t prepare her for living outside of a dormitory once she was here.
Jae Duc didn’t have the first clue about cooking or cleaning up after herself. However, to her credit, this didn’t stop her from trying. It was not unusual to find a vat of her latest creation on the stove, all over the stove, and somehow on the ceiling above the stove when our other roommate Laura and I returned from our summer jobs. A typical Jae Duc concoction might consist of canned mixed vegetables, canned cheddar cheese soup, and a can of cream of shrimp soup, all served over rice.
After a few weeks, Laura brought home a big jar of kim chi in self defense. She cooked some rice and all of us ate it with the spicy, fermented cabbage. Jae Duc was surprised that Americans would want to eat Korean food. We told her we were surprised she would want to eat casseroles when tastier Korean options were available. And so peace returned to the kitchen, or at least the kitchen ceiling, for the last days of Jae Duc’s stay.
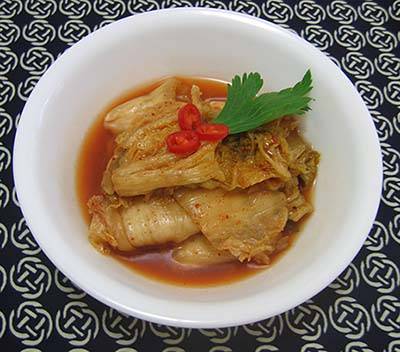
Kim chi is a Korean staple that is served at all meals of the day, year round. The vegetable — cucumber, radish, or cabbage — varies with the season and what is freshest.
Traditionally, Korean women would make enough kim chi to last the entire winter. To protect the kim chi from freezing — it is a living, fermenting thing, afterall — families would bury a couple of 30 to 40 gallon barrels of kim chi in the ground to take advantage of the earth’s heat below the frost line. Now they just use special refrigerators. Of course, you can just use quart canning jars and your own home fridge.
Homemade kim chi is hands down better than the jarred commercial versions. So if you think you don’t like kim chi, you may want to give it another try.
Kim chi is better the longer it ferments. You can eat it a few days after you make it, but waiting a few weeks is definitely worth it. Eat it over rice as we did in college, or make it into savory pancakes with dipping sauce for an appetizer. You also can make it into a hearty vegetarian tofu soup or try the more traditional pork version.
Refrigerator Kim Chi
- 1 large napa cabbage
- 1/2 cup Kosher salt
- 1 bunch green onions sliced into ½ to 1-inch thick
- 4 cloves garlic thinly sliced
- 1 inch ginger root, finely minced or thinly julienned
- 1 cup Korean red chili (see notes)
- 2 tablespoons fish sauce or 1 T Kosher salt
Cut the bottom inch from the napa, to free the leaves. Rinse thoroughly. Stacking the leaves, cut them into 1 to 1 ½” thick pieces. Toss the cabbage with the salt and leave in a nonreactive glass or steel bowl or steel pot overnight to start the fermentation. Rinse the salt from the cabbage. Mix in the green onions, garlic, ginger, chili flakes, and fish sauce. Divide the mixture between sealable containers (wide mouth canning jars work well), leaving an inch of head space at the top. Screw on the jar lids and allow the kim chi to ferment at room temperature for two to three days. (see notes) After three days, place the containers in the fridge and allow them to ferment for at least the rest of the week.
Notes: You can buy Korean dried chili at Am-Ko. It is milder than many ground chilies sold in the U.S. If you want to use American substitutes, you can use ground New Mexico chili, or a combination of sweet paprika and cayenne to suit your taste.
Place the jars of kim chi in shallow pan to collect any liquid that may during room temperature fermentation. Once the kim chi goes in the fridge, the fermentation will slow and the possibility of leaking is greatly reduced.